


Modspioneers
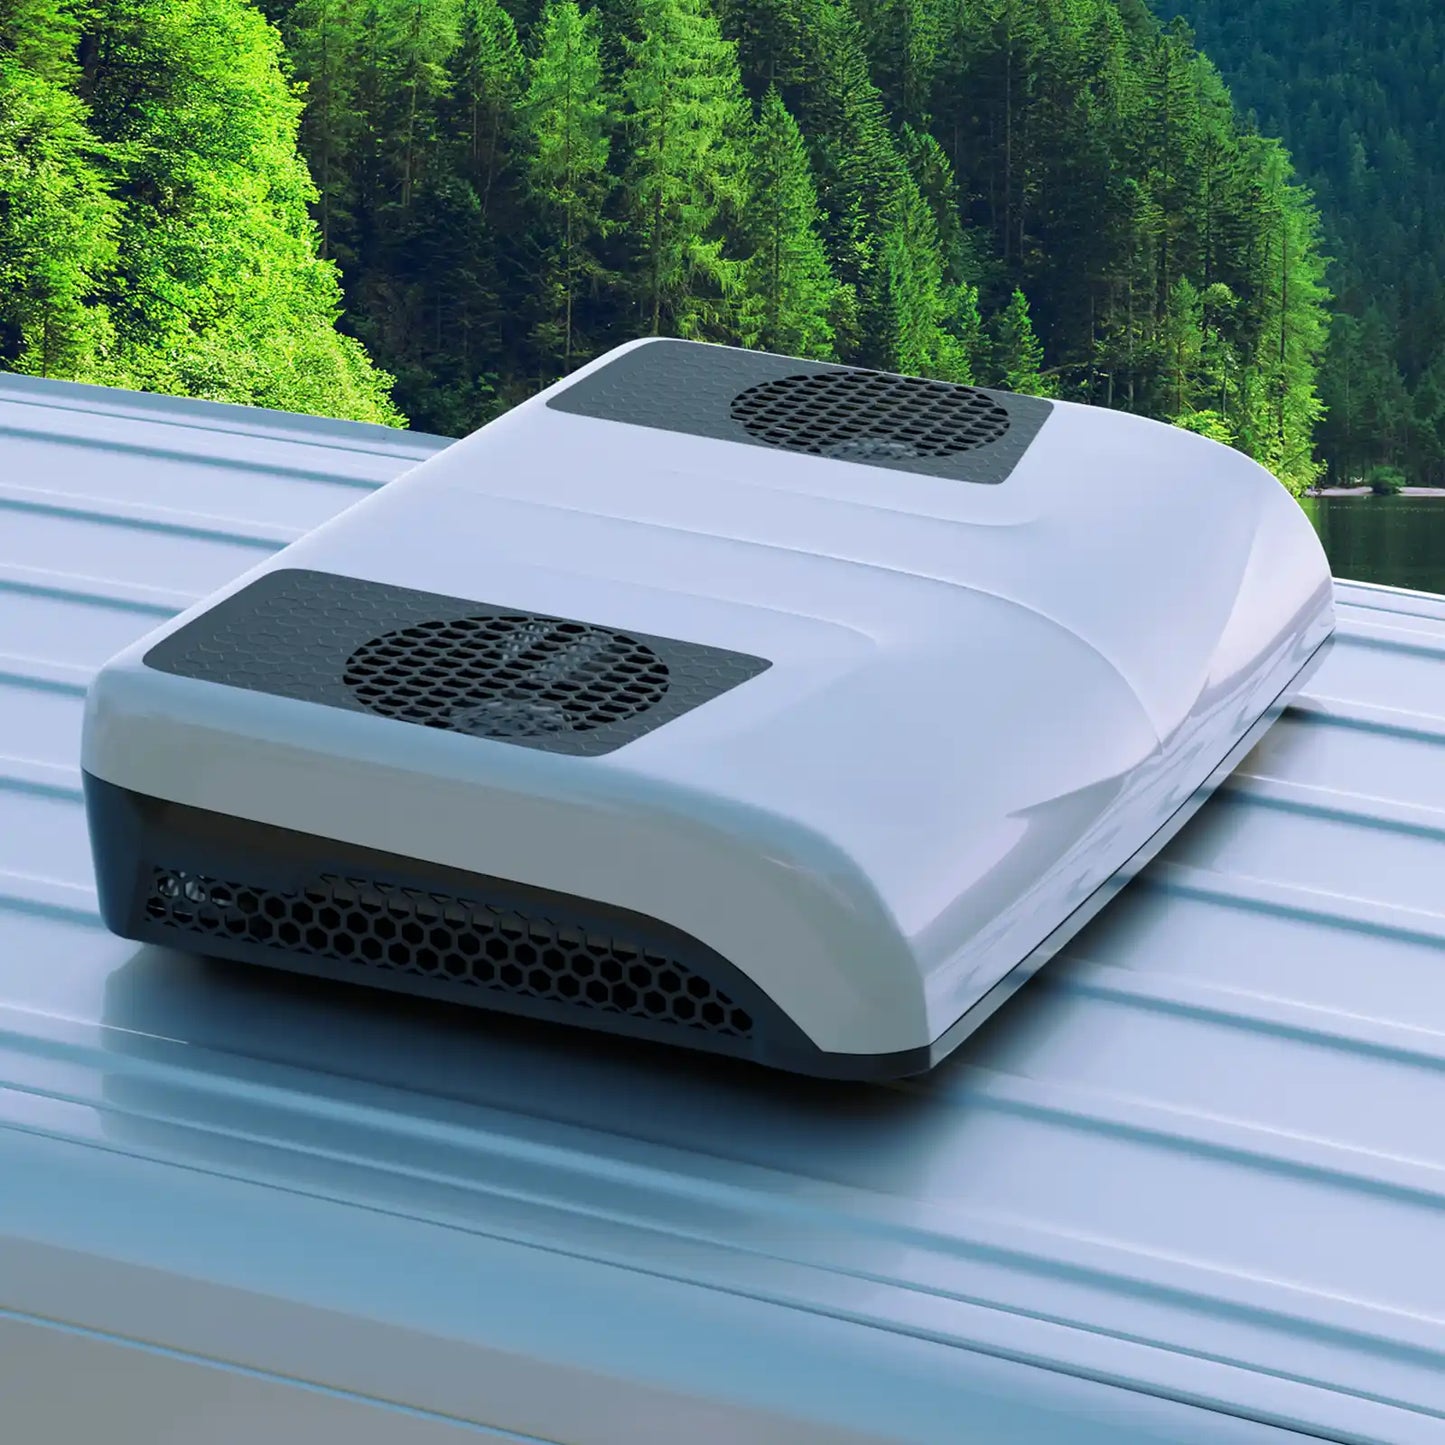
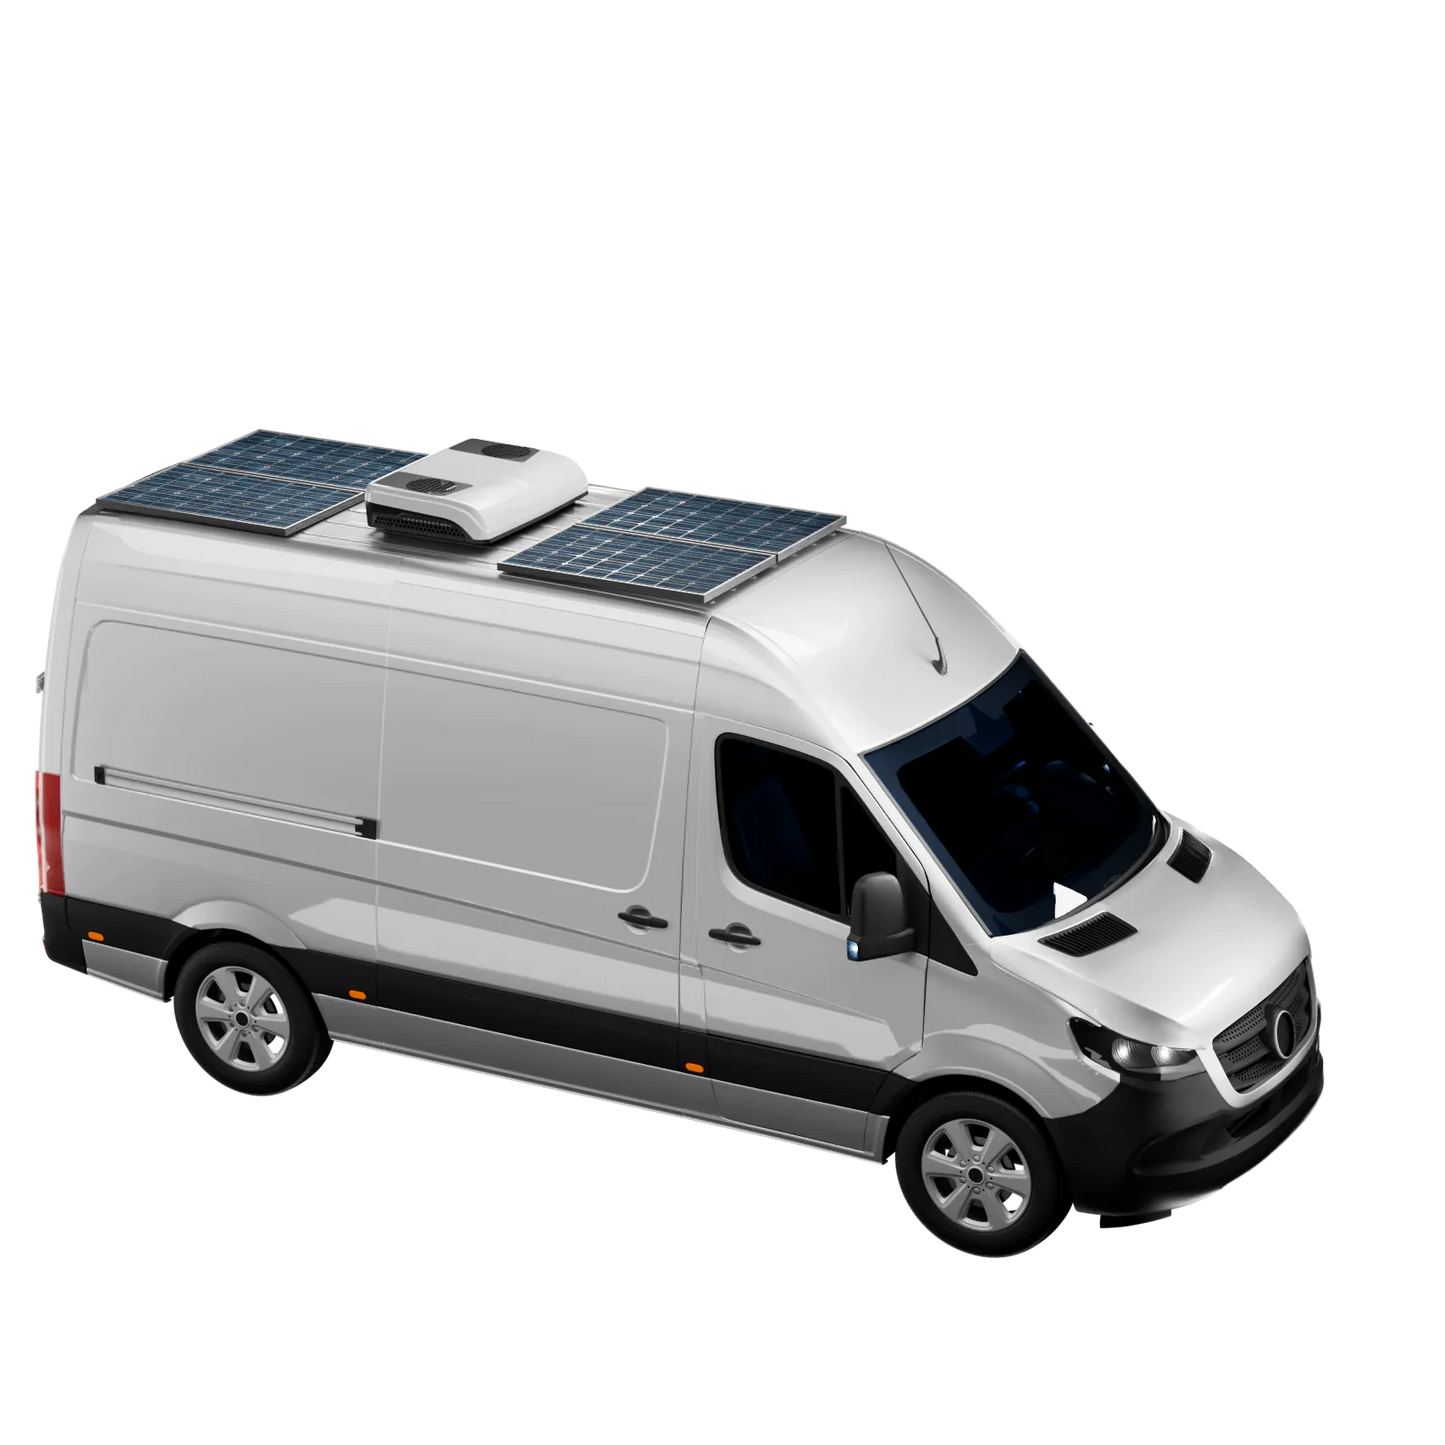
12v 8000 BTU RV Rooftop Air Conditioner
12v 8000 BTU RV Rooftop Air Conditioner
In stock
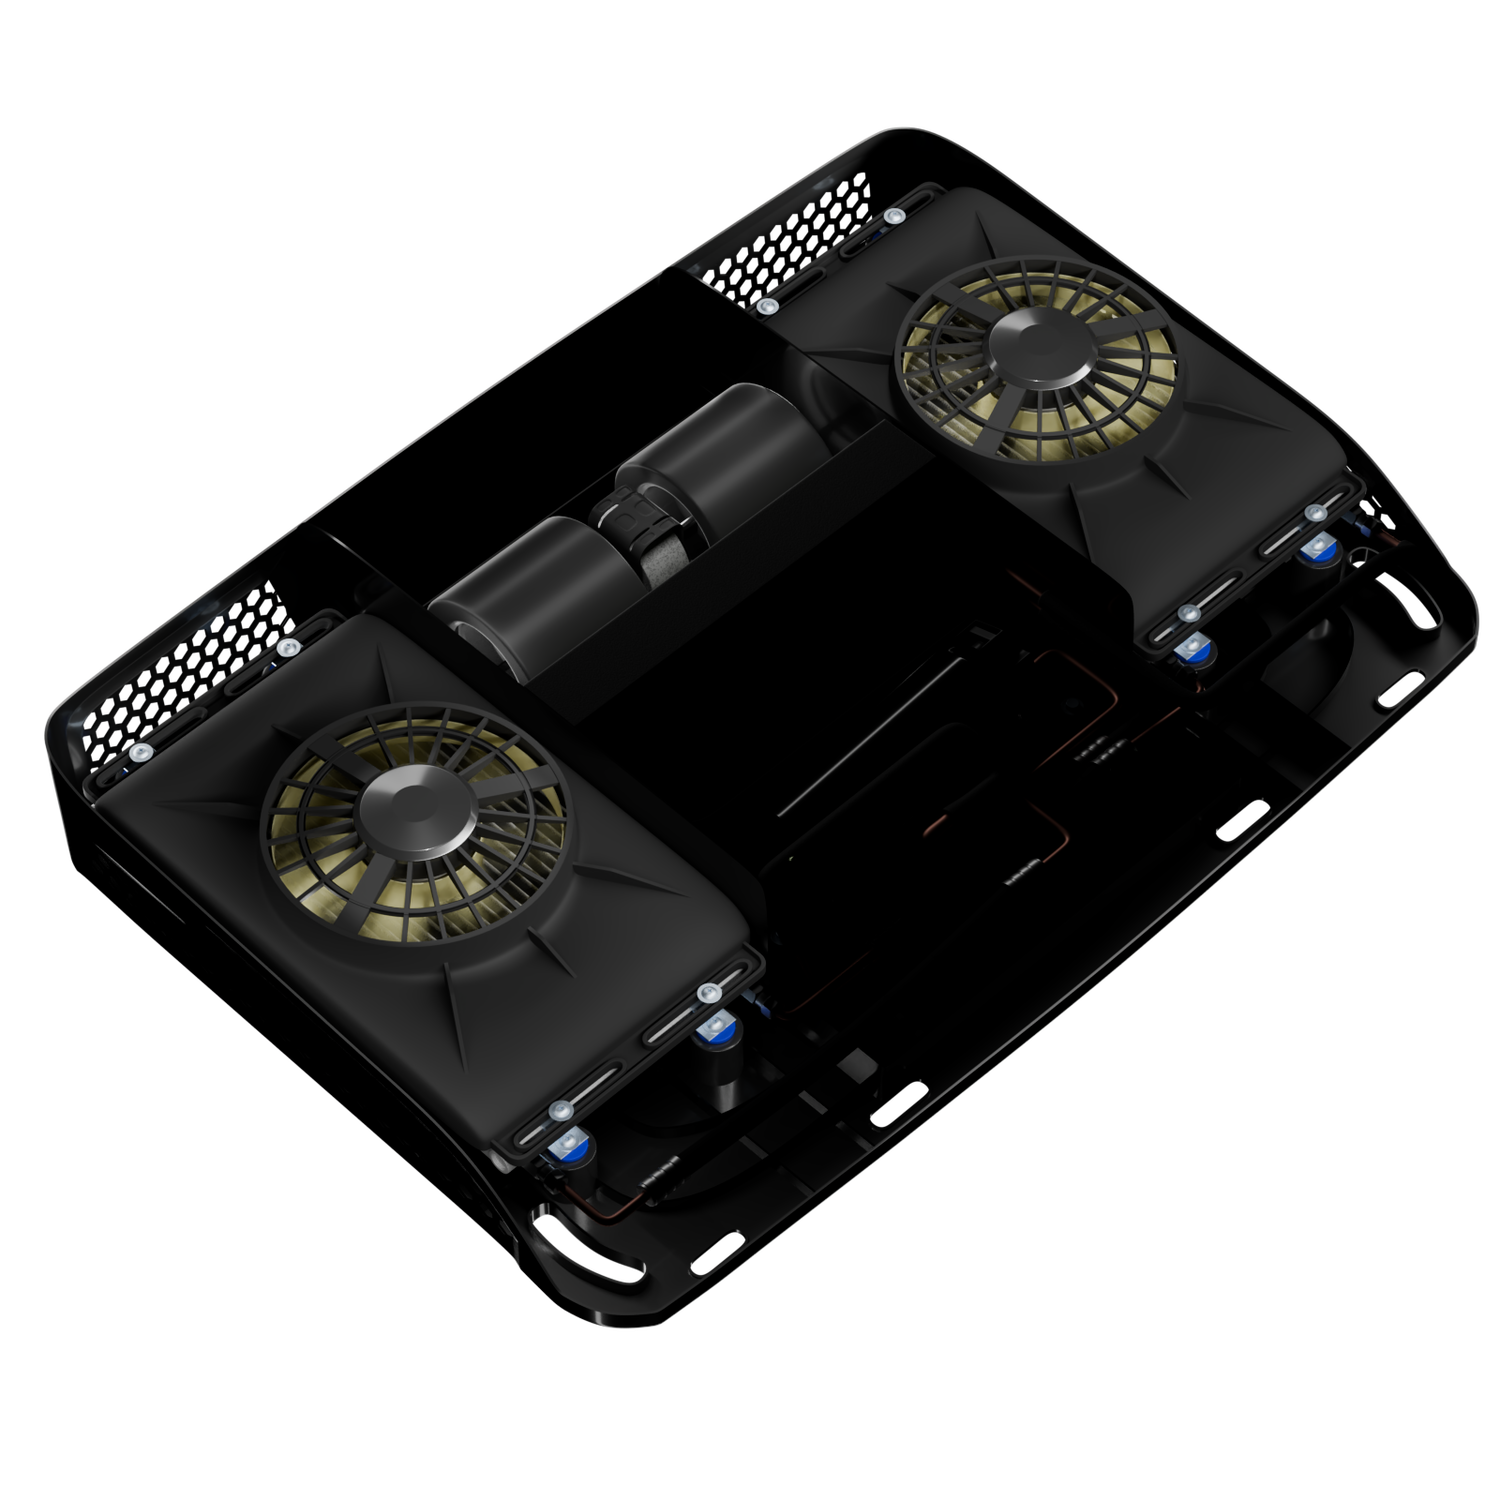
- Experience efficient cooling with our 12v RV AC unit featuring a high-efficiency variable-speed twin rotary compressor for minimal noise and vibration.
- Its quiet oscillating air vent offers three adjustable fan speeds.
- Choose from three energy modes: Max Mode for rapid cooling, Auto Mode for balanced performance, and ECO Mode for energy savings.
Couldn't load pickup availability


Enhanced efficiency
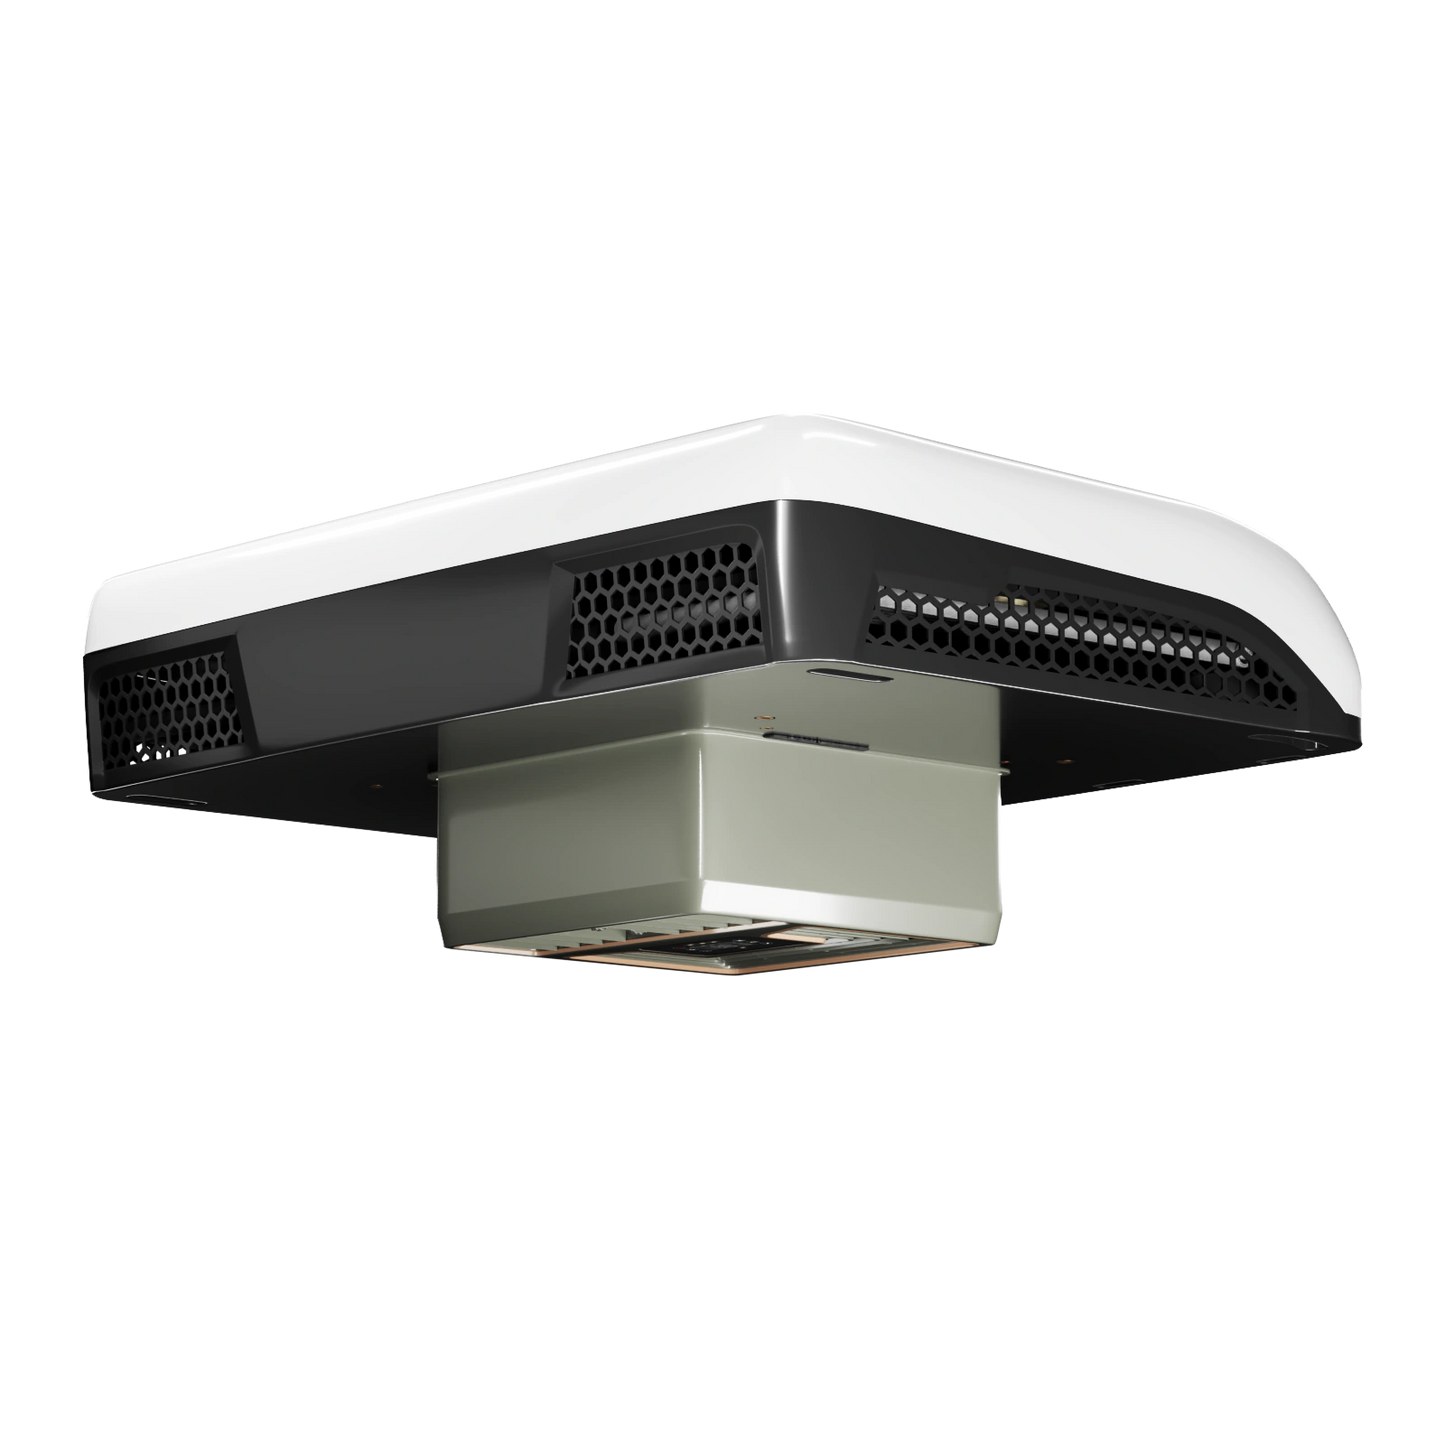
The fully enclosed air distribution box stops hot air from the ceiling/roof space of your RV from entering the air conditioner.
Quiet by design
The blower and condenser fans of our 12v RV rooftop ac unit are powered by brushless DC motors, ensuring silent operation, long-term reliability, and high energy efficiency.
Long-lasting, Efficient Performance
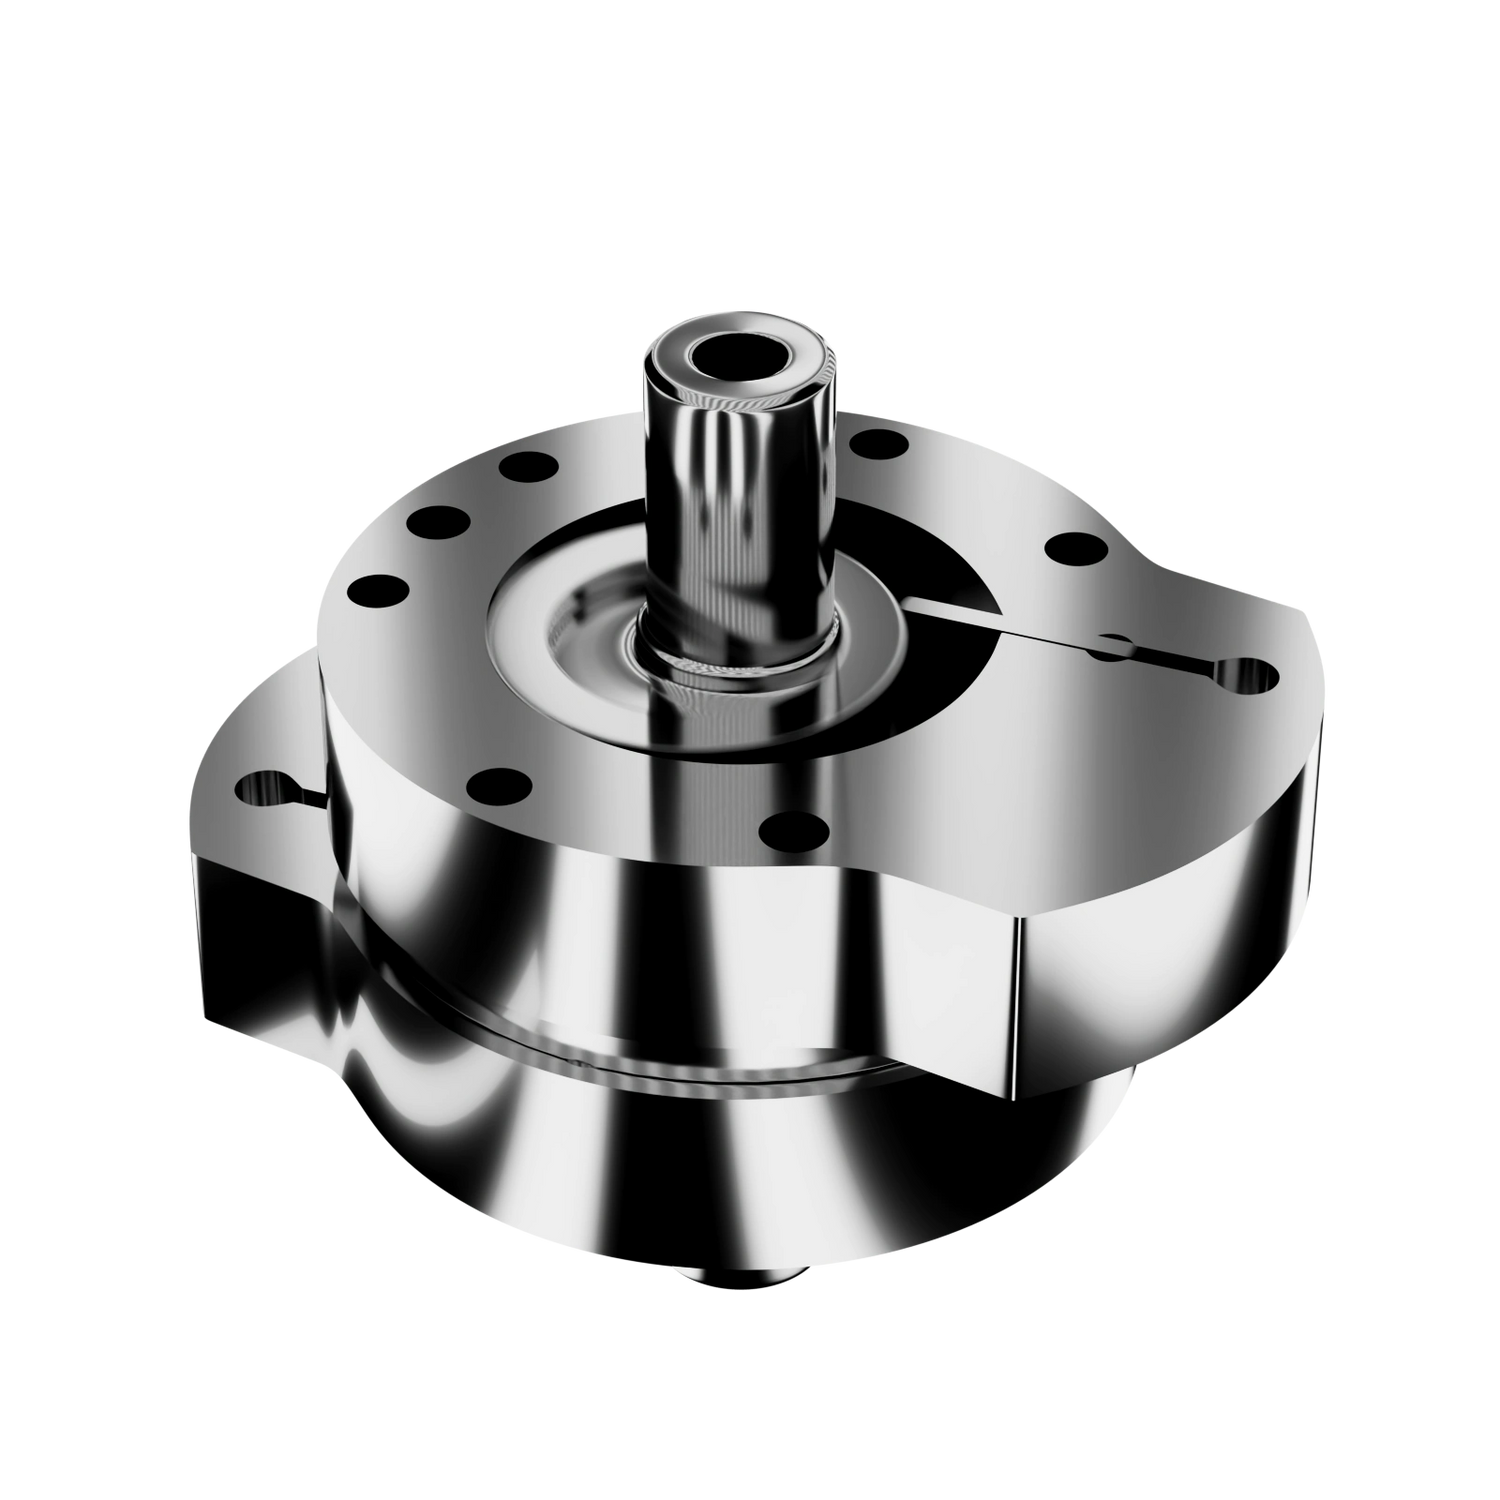
The variable speed twin rotary compressor offers a lifespan of 10 times longer than a scroll compressor and provides excellent efficiency, even at low speeds.

Copper pipes, No aluminum
Choose an 12v AC system with copper pipes for excellent cooling performance. Copper pipes are durable and resist corrosion, ensuring years of reliable operation.

High rigidity, heat resistance
Enjoy quieter, more reliable cooling thanks to our condenser fan blades made with modified PP. This material provides exceptional rigidity and heat resistance for long-lasting performance.

Easy to maintain
The air vent mesh traps dust and dirt, keeping the evaporator coil clean for optimal AC efficiency.
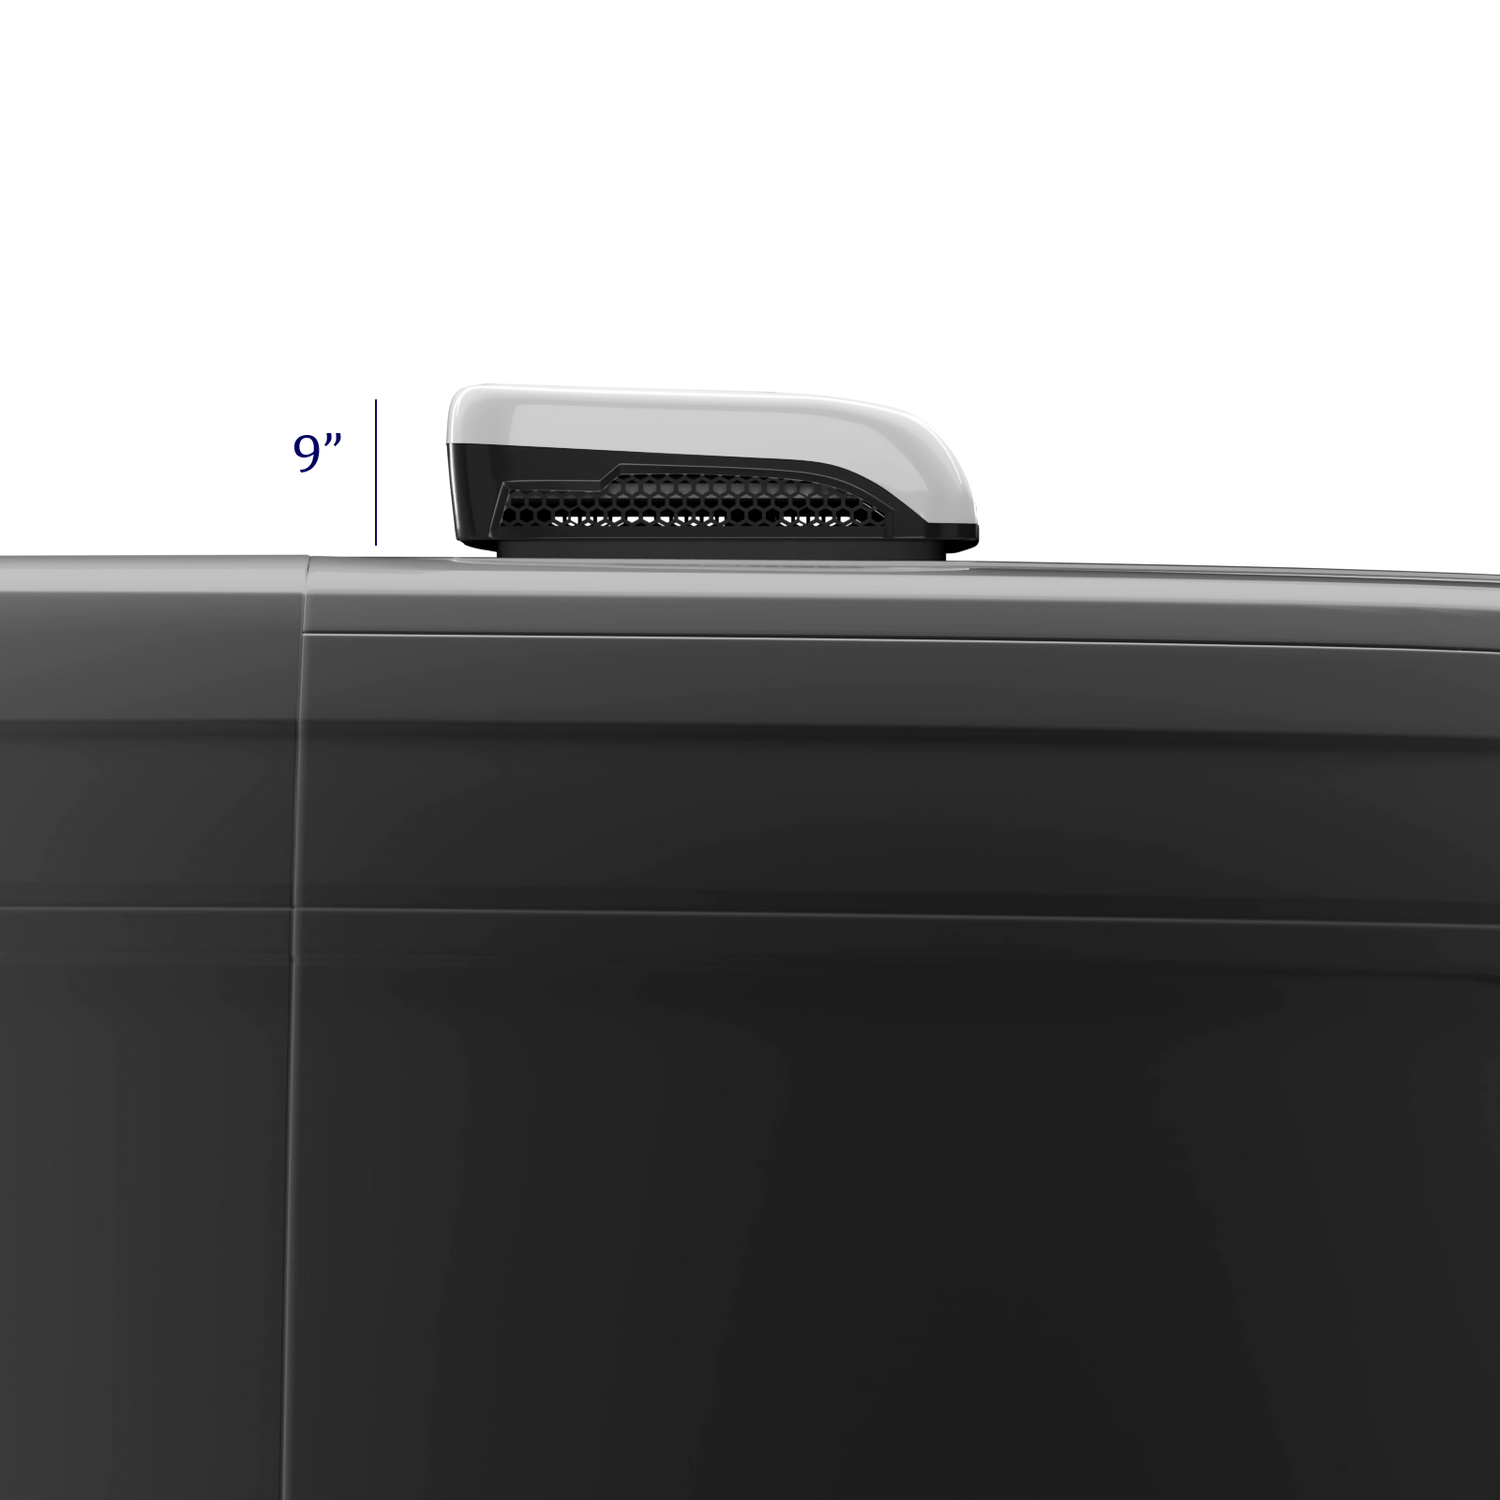
Low-Profile design
Standing at just 9 inches high, the low-profile design improves aerodynamics over bulkier models.
Reliable Cooling with Energy-Efficient Consumption
Experience consistent temperatures without the noise and energy waste associated with traditional RV air conditioners. Our 12v RV air conditioners feature a twin rotary compressor and a DC inverter, allowing it to adjust its speed for improved efficiency. This unit can precisely adjust its output to maintain your desired comfort level, avoiding the temperature fluctuations typical of on/off systems.
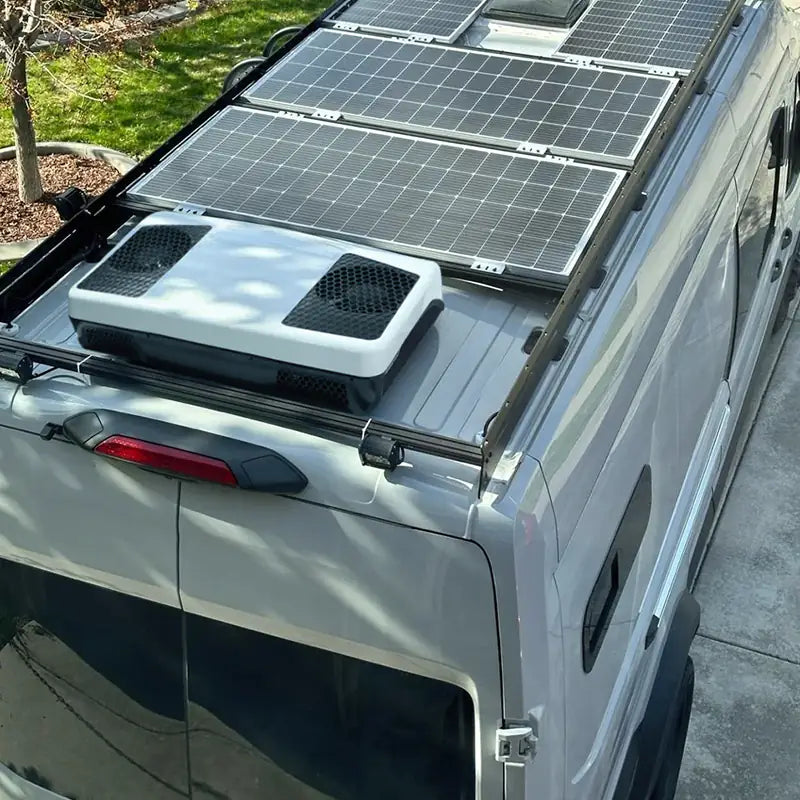
Gallery


-
Free Shipping
Enjoy free shipping within the United States. We do not ship internationally.
-
30-Day Return Policy
Request a return within 30 days of receiving your item.
-
2-Year Warranty
We offer a 2-Year Limited Warranty on your purchase.
-
Pro Support
We assist you from purchase to installation and usage.

How to Install
1. Create a Template

- Find a piece of corrugated cardboard large enough to cover the decorative plate.
- Use the decorative plate as a guide to cut an opening in the center of the cardboard, along with four bolt holes around the opening.
- Place the template over the bottom of the RV air conditioner to mark and cut out another four bolt holes.
- Mark the front and rear sides of the RV air conditioner on the corrugated cardboard.
2. Choosing a Location for Installation

Install the air conditioner on a flat, horizontal roof section while the RV is on a level surface.
For Single Unit Installation:
- Mount the unit slightly forward of center (front to back) and centered side to side.
For Two Units:
- Place one air conditioner one-third from the front and the other two-thirds from the front, both centered.
**Note:**
- The opening must be located between the roof reinforcing cross beams.
- Ensure airflow areas on two sides and the rear of the unit are unobstructed.
3. Cut openings

If your RV rooftop has a 14" x 14" air vent opening, you can utilize this existing opening. You will only need to drill eight mounting holes.
- Use the template as a guide to cut an opening and drill eight holes in your RV roof.
- Among the eight holes, four should be 15/64 inch (6 mm) for securing the decorative plate, and the other four should be 5/16 inch (8 mm) for installing the mounting bracket.
4. Installing the Rooftop Unit

Prepare the Foam Gasket
- Trim the gasket as necessary to ensure it fully contacts the RV roof surface.
- Insert rubber spacers into the holes of the gasket to prevent over-compression.
- Apply a thick bead of adhesive sealant on the roof before placing the gasket.
Install the Rooftop Unit
- Place the 12v ac unit on the gasket and secure it with the steel mounting brackets inside your RV.
5. Securing the decorative plate

Specifications
electrical & performance
Voltage
DC 12
Amperage
20-66
Wattage
800
Cord length
14.7ft
BTU cooling rating
8000
Refrigerant(prefilled)
R-410A 630g
rooftop unit dimensions

Weight
70lbs
air distribution box dimensions

decorative plate dimensions

roof opening

accessories
Mounting brackets
2
Mounting hardware
1 pack
Foam gasket
1
Remote control
1
User manual
1
